Developer Setup - For any issues send a mail to ole.devops@kuali.org
A developer's workstation can be setup by following the steps outlined below;
Hardware/Software Info
The following guide has been tested on the following hardware/software and will be updated periodically.
Hardware:
- Amazon EC2 Instance type (m1.medium)
- AMD 64 bit
- 2 CPUs
- 7.5 GB RAM
- 840 GB HDD
- Mac OS X
- 64 Bit
- 2 CPUs
- 8 GB RAM
- 240 GB Solid State HD
Software:
- Linux (3.2.28-45.62.amzn1.x86_64)
- OS X (10.7 and higher)
- Java 7
- Apache Tomcat 6 and 7
- MySQL 5.5.x
The new improvised project model/structure does not require any additional configuration files, setup or any such overrides. The steps are very simple with details below;
- Checkout code
- Build the modules (one maven command)
- Reset databases (One maven command that is re-used for all the modules and also consistent across the modules)
- Bring up the applications in the IDE
- And everything should work right from the get go.
Clean up default directories
Ensure you clean up the following folders. This may be around from pervious installations of OLE -
1. Anything under .m2/repository/org/kuali/ole;
2. anything under user.home/kuali/main/dev;
3. anything under user.home/kuali/main/local;
4. anything under user.home/.kuali
KIS account
In order to have read/write access to the OLE version control repository, one must have a valid KIS account. Please contact your project manager to have an account created.
Required Software
- Java SDK - JDK 1.7 (Java 7). The software can be downloaded from here.
Maven 3.x - OLE uses maven as the build management tool and the software can be downloaded from here. Maven uses this idea of pulling down the required artifacts (jar files) from a central repository. Sometimes the dependent jars may not be found in the central repository due to licensing issues and so Kuali also maintains a repository that has our own published artifacts. A common example would be oracle jar that is not published to the central repository.
Tomcat - OLE is deployed under Tomcat web container. The software can be downloaded from here. Tested versions are 6.x and 7.x.
Required database libraries for tomcat
Ensure the following jars are in your tomcat.home/lib directory; ojdbc6.jar and mysql-connector-java-5.1.13.jar. These jars can be found in your user.home/.m2/repository directory as it gets downloaded via maven once you do a build.These jars will be required for database connectivity when the applications are launched in tomcat.
Increase memory and enable UTF-8 for file uploads in setenv.sh (Linux) or setenv.bat (Windows) in tomcat's bin directory, eg./usr/share/tomcat7/bin/setenv.shexport JAVA_OPTS="$JAVA_OPTS -Xms512m -Xmx1g -XX:MaxPermSize=512m -Dfile.encoding=UTF-8"
C:\tomcat\bin\setenv.batset "JAVA_OPTS=%JAVA_OPTS% -Xms512m -Xmx1g -XX:MaxPermSize=512m -Dfile.encoding=UTF-8"
Make sure there is
URIEncoding="UTF-8"in theConnectortag of tomcat's server.xml, eg.MySQL/Oracle - OLE supports both MySQL and Oracle and these can be downloaded from here.
Oracle Install
Oracle can be installed by following directions documented at Install Oracle 11g using VagrantMySQL version
KOLE is compatible with both 5.6.x and 5.5.x versions of MySQL server.
For MySQL put the following options into the[mysqld]or[server]section of a MySQL server configuration file, eg./etc/mysql/conf.d/mysql-ole.cnf,/etc/my.cnf.d/server.cnf, or/etc/my.cnf.
Checking out the codebase
- OLE codebase can be checked out from the following SVN location.
You can download or use the following scripts to update/checkout the code, build and reset the databases for the modules. You will need to save these scripts in files with .sh extension and run using ./name-of-the-file.sh command. Also ensure you have the system property OLE_DEVELOPMENT_WORKSPACE_ROOT set.
a. Checkingout/Updating from SVN and building (Replace svn update with svn checkout in the script below depending on if its the first time or not).
b. DB Reset (Replace the password with the appropriate root password in your MySQL install).
Building the OLE modules (If you haven't run the automated scripts above in step 3, then follow the steps below for step by step building and resetting of the db)
The database refresh process for all the modules has been streamlined. In order to run the db refresh, you will need to change into the web app directory of the individual modules and run the maven command as explained below.OLE is made up of several modules but in order to build the whole project and generate the two war files (olefs.war and oledocstore.war), you must execute the following;
From the root directory of where the OLE codebase has been checked out run the following maven command
mvn clean install -DskipTests=true- Building the OLE application
Database setup - The default database setup is MySQL and running the following maven command will setup a clean database for OLEFS. The default username and passwords are OLE/OLE. Also the default dba username is root and password is none.
cd project-directory/ole-app/olefs
mvn initialize -PdbAlternatively if you have your MySQL server setup with a dba username/passoword, then update your maven command to the following and execute
mvn initialize -Pdb "-Djdbc.dba.username=[fill me]" "-Djdbc.dba.password=[fill me]"- Verify the database got created by; there should be an entry for OLE in MySQL
- Generating the war file - The war file would have been generated as part of 4.a and can be located under project-root-directory/ole-app/ole-fs/target/olefs.war;
- Building the OLEDOCSTORE application
- Database setup - The docstore tables get created as part of the OLEFS build process. Both OLEFS and OLEDOCSTORE share the same schema.
- Generating the war file - The war file would have been generated as part of step 4.a and can be located under the project-root-directory/ole-docstore/ole-docstore-webapp/target/oledocstore.war
IDE Setup
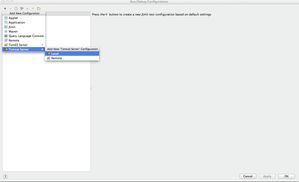
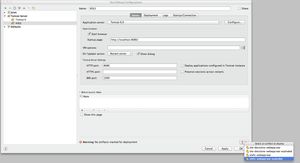
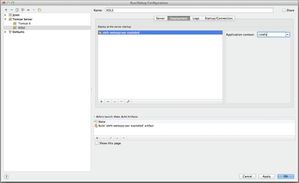
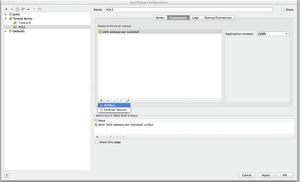
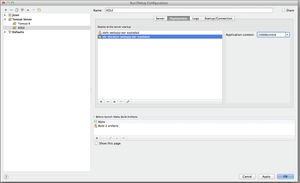
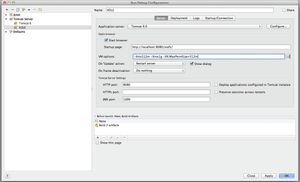
IntelliJ: The following images show a typical IntelliJ setup.
Eclipse: Coming soon.
Auto data loads during start-up
The auto ingestion of workflow files and other reference data files happens only once when the database state is clean. As the application starts up, a flag is checked in the database for OLE to ensure the files haven't been loaded previously. In an event you need to force the workflow ingestion at any given point, you will need to go to the appropriate class that are doing loading of the files and force it to do so by turning the forceLoad flag to true.- OLEFS
- workflows - Folders under src/main/resources/org/kuali/ole/workflows folder within the olefs module get copied to a location specified in the Bootstrap-config.xml file where they are picked up from for auto ingestion. This is usually under user.home/kuali/main/local/olefs/workflows/pending folder. The XmlPoller scans the pending folder every 30 seconds and automatically ingests the files and moves it the loaded folder under user.home/kuali/main/local/olefs/workflows. If there are any issues, then it moves those files under problem folder.
- OLEDOCSTORE
- Bibliographic Records - coming soon!
- Instance Records - coming soon!
- License Request/Agreement documents - coming soon!
- OLEFS
Verification
Once tomcat is up and running you can open up a browser and try the following;
- localhost:8080/olefs
- localhost:8080/oledocstore
